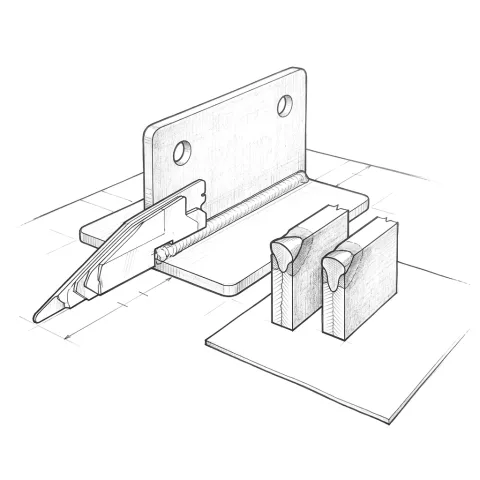
If the robot is repeatable, why does it miss the seam?
An industrial robot returns to a programmed point with very little scatter every time. That is repeatability. If the robot misses the seam, it is not the robot that has changed but the position of the seam relative to the robot. There are four possible sources: the part itself, the fixture that holds it, the position of the torch relative to the robot (the TCP, or tool centre point) and the assumptions built into the program.
Heat distortion is a fifth factor, and it behaves differently because the part moves while it is being welded. The weld zone expands as it heats and contracts as it cools, producing longitudinal and transverse shrinkage and angular distortion. A wire that is on the joint at the start of a long seam can be off it by the end.
Where does the deviation come from? Measure first
The first diagnostic step is to find out whether the deviation is random or systematic. Collect data for a few days before you touch a sensor or the program.
A simple method: on each part, measure or read from a section how far the wire tip is from the joint line at the start, middle and end of the seam. Next to each measurement, note the supplier, die, batch, fixture station, date and time, and the time since the last TCP check. A table of a few dozen parts usually ends the argument.
| What you see | Likely source | First check |
|---|---|---|
| Same direction, same amount, on every part | TCP drift, fixture moved, or a program point | TCP check, fixture reference measurement |
| Deviation started after a collision or torch change | TCP | TCP check and recalibration |
| Deviation follows a supplier, die or batch | Part variation | Part measurement, correction at the supplier, or seam finding |
| Random from part to part, no pattern | Play in the fixture, clamping sequence, loading differences | Locating pins, clamps, how the operator loads the part |
| Deviation grows along the seam | Heat distortion | Weld sequence, tacking, clamping |
| Deviation grows slowly over weeks | Fixture wear, spatter build-up on locators | Measure pins and locating surfaces |
| Only on one side of a two-station turntable | Difference between the two fixtures | Compare both fixtures by measurement |
Three simple tests to separate the causes
The table points you in a direction; these three tests usually give the answer. None of them needs extra hardware.
- Dry run without an arc. With a part clamped, cut the wire to a fixed stick-out and run the program slowly without striking an arc. Check where the wire tip sits relative to the joint line at the start, middle and end of the seam. If the wire is on the joint on the cold part but the seam drifts during welding, the cause is most likely heat distortion. If the wire is already off the joint on the cold part, the cause is the part, the fixture or the TCP.
- Re-clamp the same part. Take one part, unload and re-clamp it five or six times, and measure the same point each time. If the same part sits differently with each clamping, the problem is the fixture or the way it is loaded. If the same part always sits in the same place but different parts sit in different places, the problem is the parts.
- Reference point check. Put a fixed reference pin in the cell and send the robot to it regularly. If the wire tip doesn't meet the pin, the TCP has drifted. Repeating this check after every collision and every torch change makes every later diagnosis easier.
In what order should you fix it?
The right order starts with the cheapest step that removes the cause. Seam tracking comes last because it compensates for the remaining variation; it does not remove its source.
- Fixture and part fit-up. Does the part seat on the same locators every time, do the clamps close in the right order, are the pins worn? A robot cannot fill an open gap with extra metal the way a welder can. Keeping the joint gap under control through fixture and part quality comes first.
- TCP calibration and torch maintenance. Collisions, a wrongly defined TCP and torch or swan-neck changes knock the torch out of position. Regular TCP checks, wire cutting for a constant stick-out, cleaning spatter out of the gas nozzle and timely contact-tip changes belong in the maintenance plan. Once you can trust the TCP, it becomes much quicker to see that the remaining deviation comes from the part.
- Program. For heat distortion, the answer is often the weld sequence: balancing welds about the neutral axis, not finishing a long seam in one direction, using back-step or skip welding, and tacking in the right order. Torch angles and point placement get a review too.
- Seam finding or seam tracking. If, after all that, there is still more variation than the wire tip can tolerate, it is time for a sensor.
Repeat the same measurement table after each step. It is the only way to see whether a fix worked and how much of the deviation it removed.
Are seam finding and seam tracking the same thing?
No. Seam finding locates the start and position of the seam before welding and shifts the program accordingly. Seam tracking keeps correcting the path while the weld is running. If the part has shifted but kept its shape, finding may be enough. If the seam moves during welding, that is, if there is heat distortion, you need tracking.
Which method suits which job?
Three methods are common in industry. The table summarises figures published by robot and torch makers; exact limits vary with the robot brand, the welding power source and the sensor.
| Touch sensing | Arc sensing (through-arc tracking) | Optical tracking (laser or camera) | |
|---|---|---|---|
| What it does | Finds the seam before welding | Corrects the path during welding | Finds before welding and tracks during welding |
| What it needs | Sensing through wire or nozzle, wire cutter and wire brake, clean edges | Weaving, a stable arc, a separate search for the start point | Sensor mounted ahead of the torch, calibration, space for the sensor |
| Cycle time impact | Roughly 3 to 5 seconds per search direction, at least two searches per seam | Weaving and limited travel speed (roughly 0.9 to 1.3 m per minute) add time | Lowest: about 0.25 seconds per scan; suits high travel speeds |
| Joint types | Fillet and lap | Fillet and lap; deep grooves that are not completely filled | Fillet and lap, including thin-sheet lap joints |
| Limits | Only finds position, can't see movement during welding; gets difficult below roughly 3 to 5 mm edge thickness; bent wire and dirty surfaces cause errors | Unstable on thin material (makers give lower limits between 2 and 5 mm); used with MIG/MAG on mild and stainless steel, not on aluminium; struggles on short seams and over tacks | Restricts torch access; shiny surfaces are difficult; laser-point seam finding cannot find square butt joints; highest cost |
Keep two things in mind when reading the table. First, the methods are not mutually exclusive: cells using arc sensing often find the start point by touch sensing. Second, no sensor closes an open joint gap by itself. Some laser systems can measure the gap and adapt welding parameters, but that has limits too.
Does seam tracking guarantee weld quality?
No. Seam tracking puts the torch in the right place; it doesn't tell you whether the weld itself is good. A weld in the right place can still have porosity, lack of fusion or burn-through. Those come from welding parameters, shielding gas, surface condition and gap. Checking the weld itself needs a separate method, such as cut-and-etch sections or weld pool monitoring.
Checklist before you add seam tracking
- Has the source of the deviation been measured, and have fixture, TCP and program fixes been made?
- Does the remaining deviation exist before welding, or does it appear during welding?
- Do joint type, material thickness and material suit the chosen method?
- Is there room around the torch for a sensor, and do clamps block its view?
- How many seconds does the method add to the cycle, and does your takt time allow it?
- Who maintains the sensor: protective glass, calibration, cable replacement?
- How will the result be verified: cut-and-etch sections, measurement, rework rate?
How Piot helps
We develop customer-specific vision systems for robotic welding. Our weld seam tracking corrects the robot's welding path while it welds and is camera-based. Because we also design and build fixtures ourselves, if the measurements say the deviation comes from the fixture, we start with the fixture; a sensor is not always the first answer. If you are planning a new robotic welding cell, we make these decisions together at the design stage. On the first visit we look at your sample parts with you and review where the deviation may be coming from.
Sources
- ABICOR BINZEL: How Seam Tracking Solutions Compare (time, thickness and material limits of touch sensing, through-arc and optical tracking)
- Yaskawa Motoman: Knowing When Welding Sensors Make Sense (where each method fits and where it doesn't)
- Yaskawa Motoman: Pros and Cons of Robotic Seam Finding and Seam Tracking (finding vs tracking, thin-gauge lap joints, torch access)
- Yaskawa Motoman: ComArc Seam Tracking (weaving requirement, fillet joints and deep grooves)
- Lincoln Electric: Intelligent Robotic Arc Sensing (how through-arc tracking works, aluminium limit)
- ABB: Torch Service Center (causes of TCP drift, wire cutting and TCP checks)
- TWI: Distortion: types and causes (causes and types of weld distortion)
- TWI: Distortion control: prevention by fabrication techniques (weld sequence, back-step and skip welding, tacking)
- Robotiq: How to Achieve Good Part Fit for Robotic Welding (part fit-up and fixturing)